


Step by Step Vintage Styling: 4 Classic Vintage Hairstyles

Four vintage hairstyles that any beginner can reproduce at home are pin curls, victory rolls, the 1940s chignon, and roller-set waves. Each one uses a wet-set or roll-and-pin technique that requires no specialist training, just the right tools and a little patience. To get started, gather three essentials: rollers or curlers, setting lotion, and bobby pins. Then pick your look and follow the numbered steps below for our step by step vintage styling...
Here is what makes each style distinct at a glance:
Pin curls: small, flat ringlets wound from damp hair and clipped until dry, producing soft, close waves
Victory rolls: two or more large barrel sections rolled upward and away from the face, secured with U-pins for that bold 1940s–1950s silhouette
1940s chignon: hair gathered at the nape, rolled or tucked under, and pinned into a smooth, low knot
Roller-set waves: uniform waves created by winding damp hair around rollers of varying sizes, then brushing out after drying
What tools do you need for step by step vintage styling?
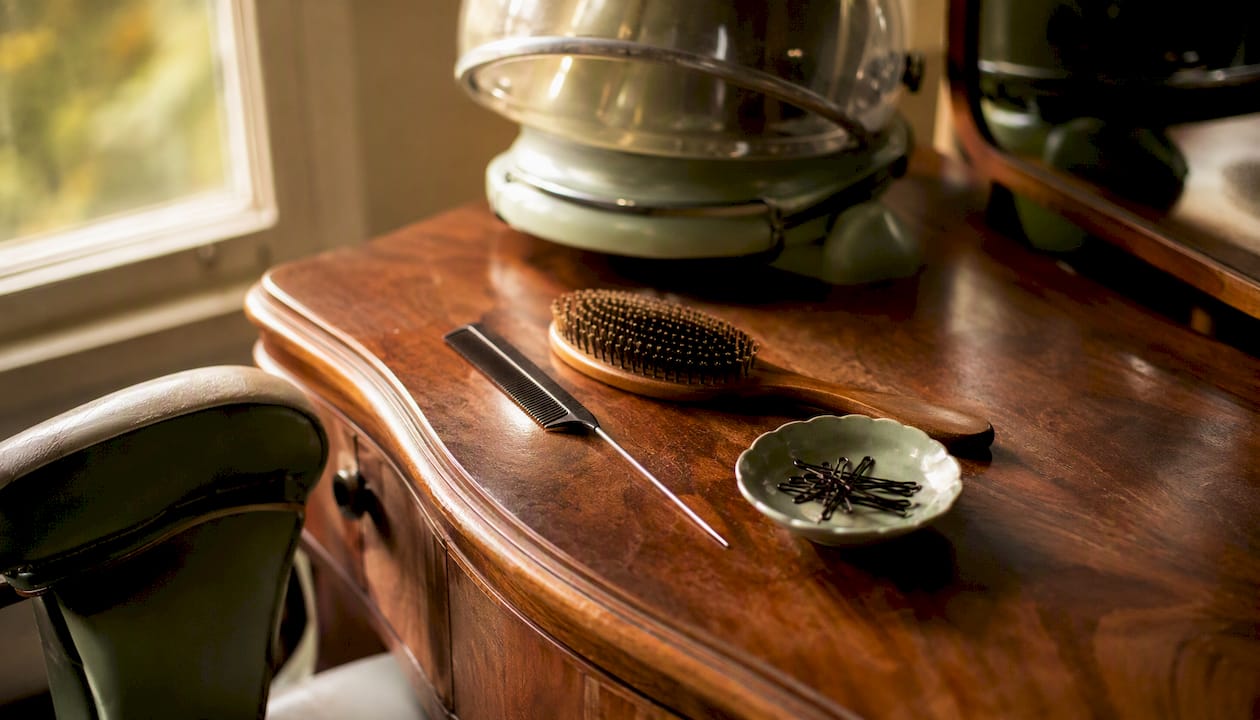
Getting the right kit together before you start makes every technique far easier. Choosing the right tools — roller sizes, teasing combs, hair nets, quality bobby pins, and a boar-bristle brush — directly affects wave size and the quality of your finish, and most essentials are genuinely affordable.
Your core checklist:
Curlers or rollers (foam rollers for a budget-friendly wet set; heated rollers as a time-saving alternative)
Pin curl clips (single-prong for flat pin curls; double-prong for larger sections)
Bobby pins and U-pins (U-pins hold rolls without denting the barrel shape)
Rat-tail comb for clean sectioning and backcombing
Boar-bristle or natural-bristle brush for smooth brush-outs
Setting lotion or mousse (mousse works well as an everyday substitute for traditional setting lotion)
Strong-hold hairspray
Hair net or snood to protect the set while drying
Silk scarf for overnight protection
A rat-tail comb, boar-bristle brush, setting lotion, and strong-hold hairspray form the practical core of any 1940s wet-set and brush-out workflow, so prioritise those four if you are buying from scratch.
Pro Tip: Invest in a bonnet or hooded dryer if you plan to wet-set regularly. It cuts drying time significantly and produces a more even set than air-drying alone, particularly for thicker hair.
How should you prepare and section your hair before styling?
Good preparation is what separates a set that holds all day from one that drops within an hour.
Step-by-step prep:
Wash hair and towel-dry until damp but not dripping. Hair should feel like a wrung-out cloth.
Apply setting lotion or mousse evenly from roots to ends while hair is still damp.
Comb through with a wide-tooth or rat-tail comb to distribute product and remove tangles.
If using heat tools later, apply a light heat protectant before any rollers or wands.
Work in a warm room or use a hooded dryer so the set dries fully before you brush out.
Adjusting for hair type:
Fine hair: use a lighter mousse rather than heavy lotion, and take smaller sections for more defined curls
Medium hair: standard setting lotion works well; sections of roughly 1 inch suit most pin-curl and roller techniques
Thick hair: use a stronger-hold lotion and allow extra drying time; slightly larger sections prevent over-crowding
Sectioning patterns at a glance:
Pin curls: 1-inch square sections, wound flat and clipped close to the scalp
Victory rolls: two large front sections divided by a centre or side parting, each roughly 2–3 inches wide
Roller sets: horizontal rows from nape to crown, roller size chosen by desired wave scale (smaller roller = tighter wave)
Four Beginner Tutorials: Pin Curls, Victory Rolls, Chignon and Roller-Set Waves
STEP BY STEP PIN CURLS

A proper wet set on damp hair is the foundation for authentic vintage curls and gives longer-lasting, softer waves than heat-first methods.
Divide damp, product-coated hair into 1-inch sections.
Hold a section taut and wind it around two fingers from tip to root, forming a flat coil.
Slide your fingers out carefully and press the coil flat against the scalp.
Clip with a single-prong pin curl clip, crossing the clip over the centre of the coil.
Repeat across the whole head, working in rows from the nape upward.
Sit under a hooded dryer for a sufficient time to dry, or air-dry until completely dry.
Once completely cool, remove clips and gently separate each curl with your fingertips before brushing out.
What a correct pin curl looks like: a flat, even coil with no kinks or loose ends, lying flush against the scalp. Precise 1-inch sections and secure clipping are what keep curls uniform once brushed out.
Pro Tip: Roll all curls in the same direction within each row for smooth, consistent waves after brushing. Alternating directions in adjacent rows creates a tighter, more defined Marcel-style wave.
STEP BY STEP VICTORY ROLLS

Part hair at the front into two sections, one on each side of the parting.
Backcomb each section lightly at the roots to build a cushion of volume.
Smooth the surface of the section with a bristle brush so the outside looks sleek.
Roll the section upward and away from the face, forming a barrel shape.
Tuck the ends inside the roll to hide them.
Secure with U-pins pushed through the roll and into the hair beneath.
Add bobby pins at the base for extra hold, then mist with strong-hold hairspray.
Victory rolls depend on a backcombed cushion for structure and are secured with U-pins and bobby pins; careful smoothing is what preserves the barrel shape without lumps.
Pro Tip: Mist each section lightly with water or setting spray before rolling if your hair has dried out. Slightly damp hair holds the barrel shape far more reliably than bone-dry hair.
STEP BY STEP 1940s CHIGNON

Gather all hair at the nape of the neck and secure loosely with a hair tie.
Divide the gathered section into two equal parts.
Roll each part upward and inward toward the centre, tucking the ends under.
Pin each roll firmly with U-pins and bobby pins, crossing them for extra grip.
Smooth the surface with a bristle brush and a small amount of pomade or wax.
Mist with hairspray to set.
For shorter hair: use a small doughnut bun form or a hair pad tucked inside the roll to add volume and help shorter lengths stay tucked.
STEP BY STEP ROLLER SET WAVES

Divide damp, product-coated hair into horizontal rows from nape to crown.
Wind each row onto a roller, rolling upward toward the crown. Use larger rollers (1.5–2 inches) for loose, glamorous waves; smaller rollers (¾–1 inch) for tighter, more defined waves.
Secure each roller with a pin or clip.
Dry fully under a hooded dryer (30–45 minutes) or air-dry for 2–4 hours. Never brush out a set that is still warm.
Once cool, remove rollers gently and allow hair to cool for a further 10 minutes.
Brush out using a boar-bristle brush, working from the nape upward in long, sweeping strokes.
Pro Tip: Search for video demos using terms like “vintage roller set brush-out” on YouTube. Look for clips that show close-up angles of roller placement and the brush-out direction — these two stages are where most beginners need the clearest visual reference.
How do you brush out and finish a vintage set?
The brush-out is where a vintage set truly comes to life. Done well, it transforms individual curls into smooth, connected waves.
Brush-out sequence:
Remove all clips or rollers once hair is completely cool and dry.
Use a boar-bristle brush and work from the nape upward, brushing in long, sweeping strokes.
To form ridges, press the comb flat against the wave and push gently forward while the brush follows behind.
Define your parting with the rat-tail comb and smooth any flyaways with a light touch of pomade.
Finishing products, in order:
A tiny amount of pomade or smoothing cream on the palms, pressed lightly over the surface for shine
A fine mist of strong-hold hairspray held 30 cm away to set without stiffening
A second light mist after shaping any final ridges
To hide pin seams, place bobby pins horizontally along the underside of a wave, parallel to the ridge. They disappear completely once the wave sits over them.
Pro Tip: Brush through the set more than you think you need to. Over-brushing is almost impossible with a boar-bristle brush; under-brushing is what leaves the style looking stiff and separated rather than smooth and connected.
Quick fixes for the most common vintage styling mistakes
Even experienced stylists hit snags. Here are the most frequent beginner problems and their fast remedies.
Flattened victory rolls: re-tease the section at the root, re-roll, and secure with an extra U-pin. A light mist of water before re-rolling helps the hair grip itself.
Frizz after brush-out: smooth a tiny amount of pomade between your palms and press gently over the surface. Avoid rubbing, which creates more frizz.
Loose pins: switch to longer bobby pins or use U-pins instead. Crossing two bobby pins in an X formation holds far more securely than a single pin.
Uneven waves: the set likely dried unevenly. Spot-re-set the flat sections by misting with setting spray, re-rolling onto a small roller, clipping, and drying with a hand-held dryer on a low heat.
Set not fully dry: if curls feel cool and slightly soft when you remove the clips, the set has not dried completely. Re-clip and return to the dryer or allow more air-drying time. Brushing out a damp set collapses the wave immediately.
Short on time: swap the wet set for hot rollers or a wand. The result is less long-lasting but perfectly acceptable for a single-day wear.
Which accessories complete each vintage hairstyle?

The hairstyle and the accessories need to read as the same era. Pairing vintage hairstyles with era-appropriate outfit and accessory choices is what pulls a look together from head to toe.
Pin curls: pair with a slim pendant headband or a wide satin hairband. A small hair flower pinned at the side adds a 1940s sweetness.
Victory rolls: a printed silk scarf tied at the nape or a jewelled brooch pinned at the base of one roll reads as authentically 1940s–1950s. Keep jewellery simple elsewhere so the rolls remain the focal point.
1940s chignon: a fine hair net or snood worn over the chignon is both practical and period-correct. Pearl pins tucked into the roll add quiet elegance.
Roller-set waves: a wide-brimmed hat or a small fascinator sits beautifully over loose waves. A pair of clip-on earrings in Bakelite or gold tone completes the silhouette.
For outfit pairing, match the decade of the hair to the decade of the clothing. Waves and pin curls sit naturally with tea dresses, high-waisted skirts, and fitted blouses. Victory rolls call for a structured jacket or a swing dress. You can find vintage-style jewellery to finish each look without spending a great deal, and My Vintage’s guide to retro accessory styling is a good starting point for building a cohesive wardrobe around your chosen hairstyle.
Pro Tip: When in doubt about era accuracy, search museum costume archives online. The Victoria and Albert Museum’s digital collection, for example, shows real 1940s and 1950s hairstyles photographed alongside the original outfits and accessories.
How long do vintage hairstyles last, and how do you maintain them?
A well-executed wet set on clean, product-coated hair typically holds for two to three days, sometimes longer in dry climates. Humidity is the main enemy of any set; a light mist of strong-hold hairspray before you leave the house creates a barrier that extends wear noticeably.
Overnight care:
Wrap hair loosely in a silk scarf or sleep on a silk pillowcase to reduce friction and preserve the wave pattern
Tuck pin curls back into place with a few clips before wrapping if any have loosened
A hair net worn over the scarf adds an extra layer of protection for elaborate styles like victory rolls
Day-after maintenance:
Smooth any flattened sections with a boar-bristle brush and re-mist lightly with hairspray
Re-roll any collapsed sections onto a small roller, clip, and dry briefly with a hand-held dryer on low heat
Avoid washing between sets if possible; dry shampoo at the roots refreshes volume without disturbing the wave
When the style has lost its shape entirely and touch-ups are no longer working, it is time to wash and re-set from scratch. Most people find a full re-set every two to three days keeps the look consistently polished.
Sources
Here are the resources worth bookmarking as you build your vintage styling skills:
When searching for video demos, look for clips that show close-up angles of pin placement, roller winding direction, and the brush-out stroke. Those three stages are where a clear visual reference makes the biggest difference for a beginner. My Vintage at Myvintage carries authentic vintage clothing and accessories to pair with every look covered here, from 1940s tea dresses to 1950s swing skirts.
Recommended


Comments